


(tillbaka till Grundläggande Kunskaper)
Utvicklad Fågelsgrundfiguren
(Extended Birdbase)
Thanks to Joshua Koppel who is the designer of this base for letting me show the diagrams here. With the help of his base I was able to create some nice new models.
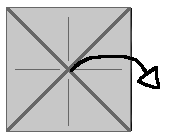
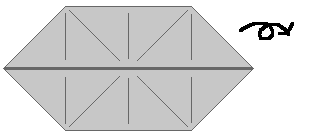
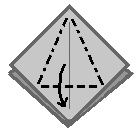
Start with a square sheet of paper.
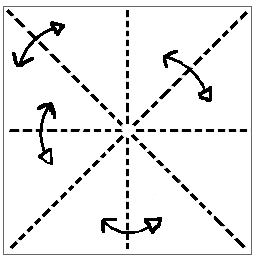 |
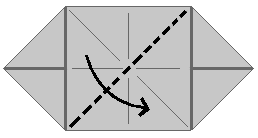
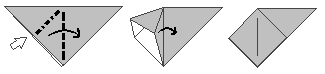
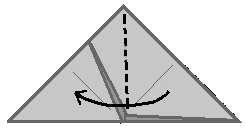
Dalsveck (Valley Fold)

Vik fram pappret i din riktning. Pilen visa riktningen som man måste vika i.
Symbol: en streckad linje
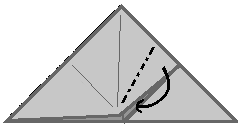
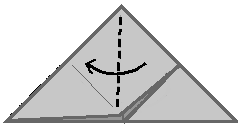
Bergsveck (Mountain Fold)
Vik pappret bakåt bort frå er.
Symbol: en streckad och prickig linje
 |
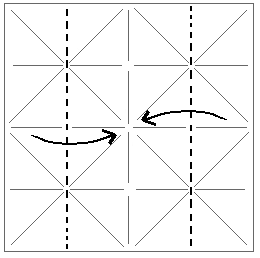
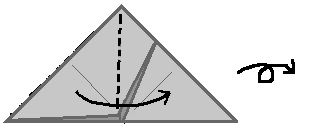
Dalsveck (Valley Fold)
Vik fram pappret i din riktning. Pilen visa riktningen som man måste vika i.
Symbol: en streckad linje
 |
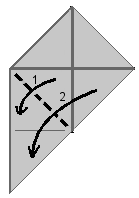
Dalsveck (Valley Fold)
Vik fram pappret i din riktning. Pilen visa riktningen som man måste vika i.
Symbol: en streckad linje
 |
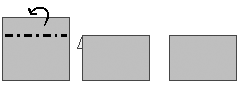
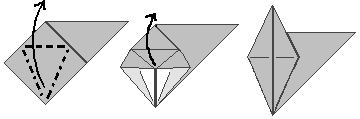
4. This is what you should get. Open up the model again.
 |
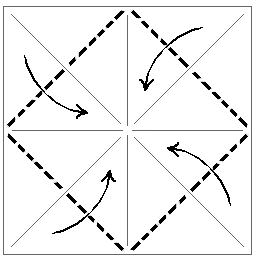
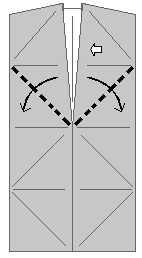
Dalsveck (Valley Fold)
Vik fram pappret i din riktning. Pilen visa riktningen som man måste vika i.
Symbol: en streckad linje
 |
Dalsveck (Valley Fold)
Vik fram pappret i din riktning. Pilen visa riktningen som man måste vika i.
Symbol: en streckad linje
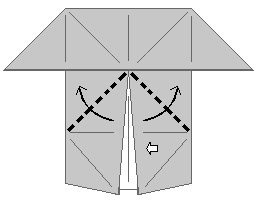 |
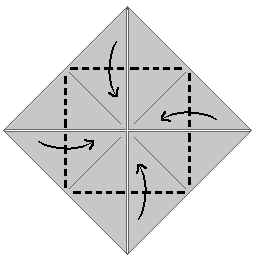
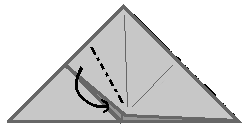
7. Repeat step 6 on the lower half.
 |
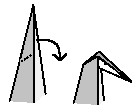
8. This is what you should get. Turn the model around.
 |
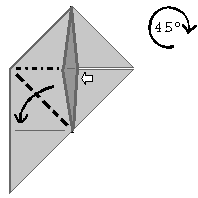
Dalsveck (Valley Fold)
Vik fram pappret i din riktning. Pilen visa riktningen som man måste vika i.
Symbol: en streckad linje
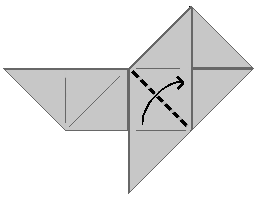 |
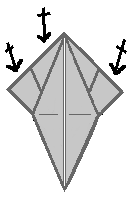
10. Swing the flap over.
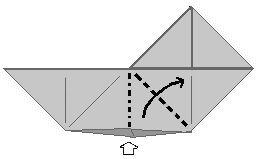 |
Plattveck (Squash Fold)
Prefold both sheets of paper along the valley and mountain fold. Then open the model, fold one layer of paper along the valley fold and flatten the model using the mountain fold.
The big white arrow tells you to open the model.
 |
12. Swing two flaps over.
 |
Plattveck (Squash Fold)
Prefold both sheets of paper along the valley and mountain fold. Then open the model, fold one layer of paper along the valley fold and flatten the model using the mountain fold.
The big white arrow tells you to open the model.
 |
(Inre) Omvändningsveck (Inside Reverse Fold)
Prefold both sheets of paper in both directions (mountain and valley). Then open the model a little bit and bring the top point down so that the mountain fold edge becomes a valley fold edge.
 |
15. Swing one flap over.
 |
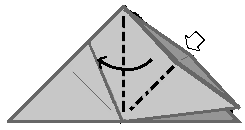
(Inre) Omvändningsveck (Inside Reverse Fold)
Prefold both sheets of paper in both directions (mountain and valley). Then open the model a little bit and bring the top point down so that the mountain fold edge becomes a valley fold edge.
 |
17. Swing the flap back and turn the model around.
 |
18. Swing one flap to the left.
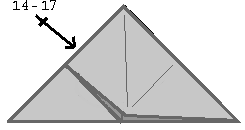 |
19. Repeat Steps 14-17 on this side.
 |
Plattveck (Squash Fold)
Prefold both sheets of paper along the valley and mountain fold. Then open the model, fold one layer of paper along the valley fold and flatten the model using the mountain fold.
The big white arrow tells you to open the model.
 |
21. This is what you should get. Repeat Step 20 on the other three flaps.
 |
Bladsveck (Petal Fold)
Vik och vik isär först de visad linjen. Lyft sedan den nedre punkten och gör det vågräta dalsvecket uppåt. Då ska sidorna av modellen flytta sig inåt. Platta till modellen med de två bergsvecken.
 |
23. This is what you should get. Repeat Step 22 on the other three flaps.
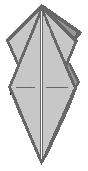 |
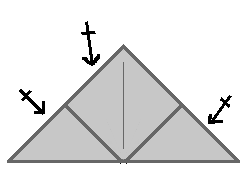
24. The finished extended birdbase. You should have the same number of flaps on both sides.
Starting from the extended birdbase you can create the following models: