Extended Flower
|
Having created the simple flower there was only a little step to this creation. |
Start with a completed simple flower. It is also a good idea to open the model and then flatten it again. It easier to open the finished model then.
 |
1. This is what you should have. For the next step the top layer isn't shown! You have to lift up the top layer a little bit to do it.
 |
2. Valley fold the sides to the sides of the triangle in the middle.
Then flatten the model along the existing creases.
Then flatten the model along the existing creases.
This can be interpreted as two inside reverse folds as well.
 |
3. This is what you should get. Valley fold the flap down as far as possible.
 |
4. Open the flap in the middle. Valley fold the middle lines up to the base line of the triangle.
Precrease each fold seperately before you bring the bottom point up and flatten the model.
The horizontal fold will be formed when you flatten the model, you don't have to make it.
This is similar to Step 3 of the simple flower.
Precrease each fold seperately before you bring the bottom point up and flatten the model.
The horizontal fold will be formed when you flatten the model, you don't have to make it.
This is similar to Step 3 of the simple flower.
 |
5. This is what you should get. Repeat Steps 2-4 on the other three flaps.
 |
6. Now carefully pull one flap after the other outside (one layer of paper only) and squash the bottom point to form a square. The fourth flap is the hardest to pull out but be patient and you should get a nice result.
 |
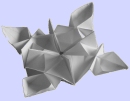
7. The finished flower.