


(back to My Own Designs)
My Rose
|
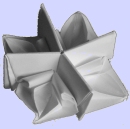
What the extended flower is to the simple flower, this rose is to the searose. I'm really proud of this model. |
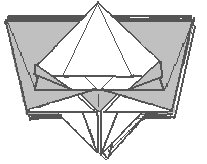
At first you have to fold the searose up to step 7.
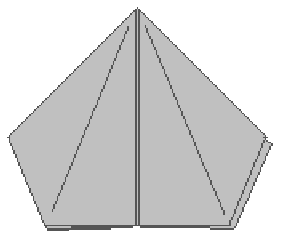 |
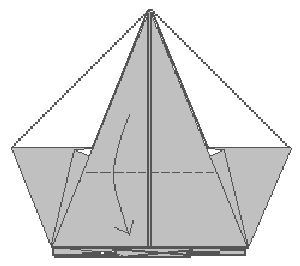
1. This is what you should have. For the next step the top layer isn't shown. You have to lift up the top layer a little bit to do it.
 |
Valley Fold

The valley fold is formed by folding the paper toward oneself. An arrow shows where to fold the piece of paper to.
Symbol: dashed line
(Inside) Reverse Fold
Prefold both sheets of paper in both directions (mountain and valley). Then open the model a little bit and bring the top point down so that the mountain fold edge becomes a valley fold edge.
 |
Valley Fold
The valley fold is formed by folding the paper toward oneself. An arrow shows where to fold the piece of paper to.
Symbol: dashed line
 |
Valley Fold
The valley fold is formed by folding the paper toward oneself. An arrow shows where to fold the piece of paper to.
Symbol: dashed line
 |
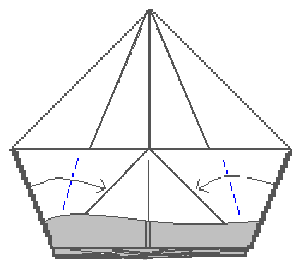
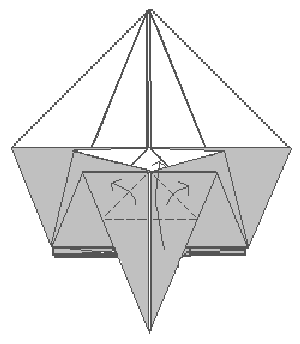
5. This is what you should get. Repeat Steps 2-4 on the other three flaps and turn the model around.
 |
Valley Fold
The valley fold is formed by folding the paper toward oneself. An arrow shows where to fold the piece of paper to.
Symbol: dashed line
 |
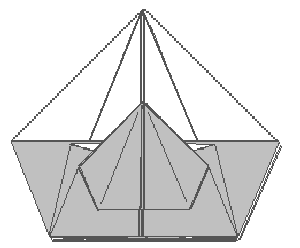
7. Repeat step 6 on the other 3 flaps.
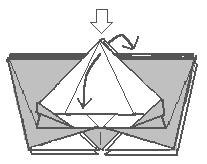 |
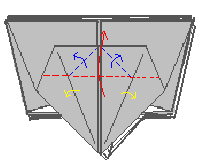
8. Now you have to open the model. To do this open out the flaps you have just formed in steps 6 and 7 while squashing the bottom point into a square.
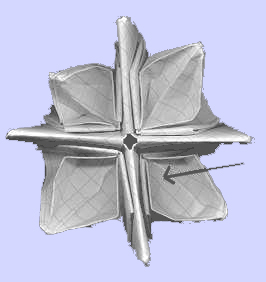 |
9. To make the model nicer and stronger pull down the 4 leaves. The best way to do this is putting your thumb where indicated and putting you index finger under the leaf. Then just pull down the leaf holding the model with the other hand.
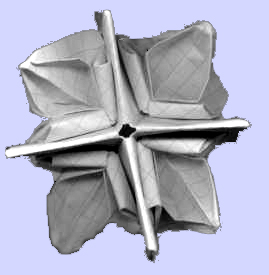 |
10. The finished rose. I hope you like it.